Repository navigation
Installation
This page covers all methods to install EthiFi firmware onto your ESP8266 board.
⚠️ Before you start — Make sure your board is recognized by your computer. If not, install the correct USB driver first → Driver Installation
⚠️ The flash size is an important factor! Using the wrong size will cause the firmware to crash or the Web UI to not load.
Check your board's flash chip size before flashing. When in doubt, 4MB is correct for most modern NodeMCU and Wemos D1 Mini boards.
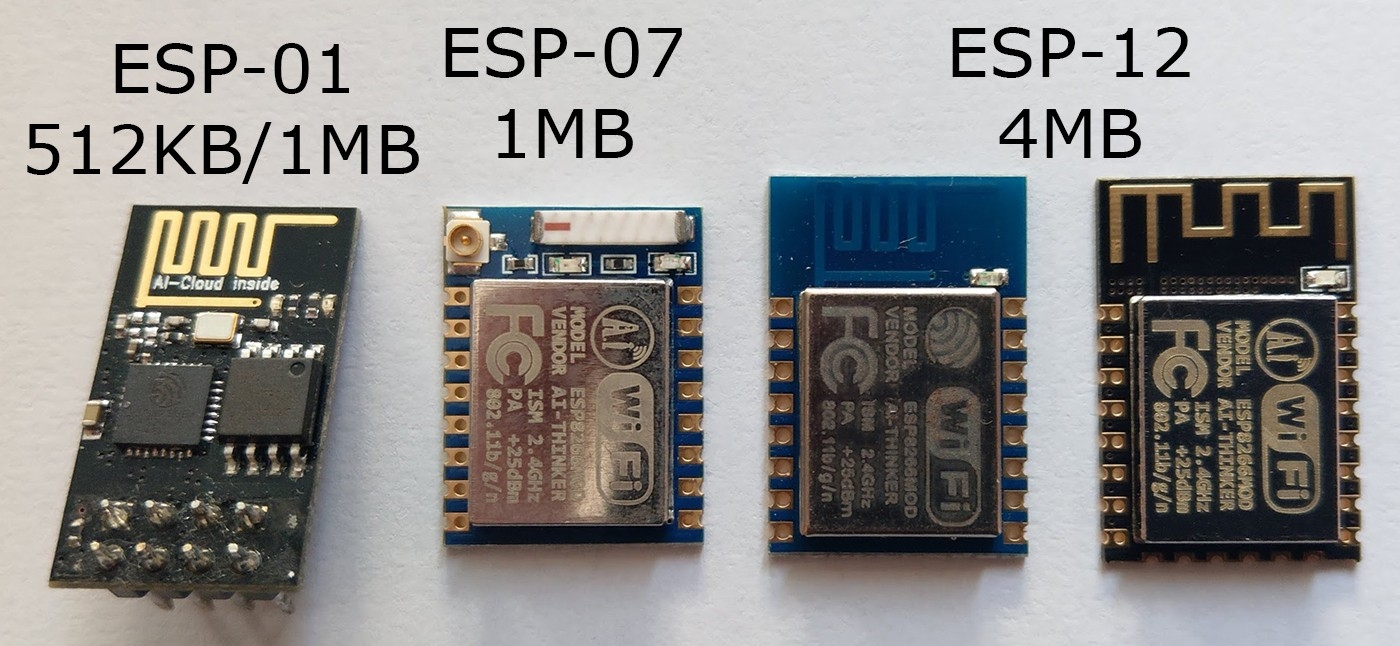
| 📦 Module | 💾 Flash Size |
|---|---|
| ESP-01 (old) | 512 KB |
| ESP-01 (new) | 1 MB |
| ESP-07 | 1 MB |
| ESP-12E / NodeMCU | 4 MB |
| Wemos D1 Mini | 4 MB |
Once EthiFi is installed on your board:
- 🚀 Getting Started — Connect to EthiFi and open the Web UI
- 🔧 Driver Installation — Board not detected? Fix it here
- 🩺 Troubleshooting — Something went wrong? Start here
<div align="center">
🌐 haybnz.web.app · 🐙 GitHub · 📖 Home
</div> # 🛠️ InstallationThis page covers all methods to install EthiFi firmware onto your ESP8266 board.
⚠️ Before you start — Make sure your board is recognized by your computer. If not, install the correct USB driver first → Driver Installation
- [💾 Choosing the Right Flash Size](#-choosing-the-right-flash-size)
- [Method 1 — ⚡ NodeMCU Flasher](#method-1----nodemcu-flasher)
- [Method 2 — ⚙️ Arduino IDE](#method-2--️-arduino-ide)
- [📥 Downloads](#-downloads)
⚠️ The flash size is an important factor! Using the wrong size will cause the firmware to crash or the Web UI to not load.
Check your board's flash chip size before flashing. When in doubt, 4MB is correct for most modern NodeMCU and Wemos D1 Mini boards.
| 📦 Module | 💾 Flash Size |
|---|---|
| ESP-01 (old) | 512 KB |
| ESP-01 (new) | 1 MB |
| ESP-07 | 1 MB |
| ESP-12E / NodeMCU | 4 MB |
| Wemos D1 Mini | 4 MB |
Method 1 — ⚡ NodeMCU Flasher
🟢 Recommended for beginners — No coding or compiling needed. Windows only.
1. 🔌 Plug in your ESP8266 board via USB
2. Open NodeMCU Flasher and select your COM port in the Operation tab
3. Go to the Config tab → click the gear icon on the first row → browse and select your .bin file
4. Set the address to 0x000000
5. Go back to the Operation tab
6. Click Flash
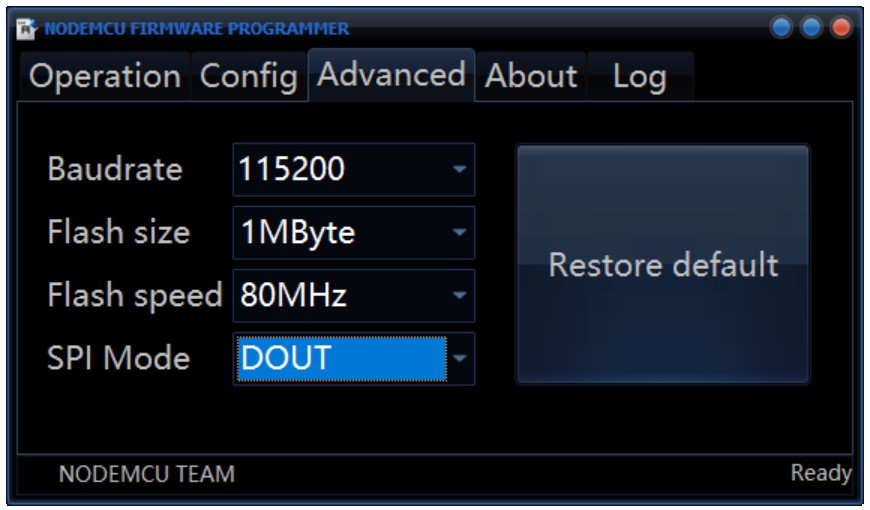
✅ When done, the board will reboot automatically and EthiFi will be running.
Method 2 — ⚙️ Arduino IDE
🔵 Recommended for developers — Compile from source, customize the code, contribute changes.
- Arduino IDE
- [EthiFi Source Code (.zip)](https://github.com/h9zdev/EthiFi/archive/refs/tags/EthFi.zip)
1. 💾 Install and open Arduino IDE
2. 📥 Download the EthiFi source .zip and extract it
3. 📂 Open esp8266_deauther.ino from the extracted folder
4. ➕ Add the custom board URL — go to File → Preferences and paste the following into Additional Boards Manager URLs:
https://raw.githubusercontent.com/SpacehuhnTech/arduino/main/package_spacehuhn_index.json
5. 🔍 Install the board — go to Tools → Board → Boards Manager, search for deauther, and install Deauther ESP8266 Boards
6. 🎯 Select your board — go to Tools → Board and choose your board under Deauther ESP8266 Boards
⚠️ Make sure it is listed under Deauther ESP8266 Boards — not under ESP8266 Modules!
7. 🔩 (Optional) Set your board config at Tools → Deauther Config
8. 🧹 (Optional) If upgrading from a previous install, go to Tools → Erase Flash → All Flash Contents to wipe old settings
9. 🔌 Select the correct COM port under Tools → Port
10.
✅ Once uploaded, the board reboots and EthiFi starts automatically.
| 📦 Resource | 🔗 Link |
|---|---|
| ⚡ NodeMCU Flasher | [github.com/nodemcu/nodemcu-flasher](https://github.com/nodemcu/nodemcu-flasher) |
| 🛠️ Arduino IDE | [arduino.cc/en/software](https://www.arduino.cc/en/software) |
| 📦 EthiFi Releases (.bin) | [github.com/h9zdev/EthiFi/releases](https://github.com/h9zdev/EthiFi/releases) |
| 📡 EthiFi Source Code | [github.com/h9zdev/EthiFi](https://github.com/h9zdev/EthiFi) |
Once EthiFi is installed on your board:
- 🚀 Getting Started — Connect to EthiFi and open the Web UI
- 🔧 Driver Installation — Board not detected? Fix it here
- 🩺 Troubleshooting — Something went wrong? Start here
🌐 [haybnz.web.app](https://haybnz.web.app/) · 🐙 [GitHub](https://github.com/h9zdev/EthiFi) · 📖 Home